
Watercolor Journaling for Beginners: Adding Paint to Your Pages
A practical guide to watercolor journaling — the small kit that actually works, the paper problem nobody warns you about, and simple techniques for painting beside your writing.
What Watercolor Journaling Is
Watercolor journaling is the practice of adding paint to a journal you are already keeping. Not painting instead of writing — painting alongside it. A wash of color behind an entry, a small study of something you looked at that day, a band of gray across the top of a page about a gray week.
It sits close to art journaling and visual journaling, but the medium changes the character of the practice. Watercolor is fast, unpredictable, and largely uncontrollable. It dries in minutes, it moves where the water tells it to, and it cannot be undone. Those qualities make it a poor choice for careful illustration and a very good one for a journal.
The unpredictability is the point. A page you cannot fully control is a page you cannot ruin by being imperfect, because imperfection was always guaranteed. That takes a particular kind of pressure off.
It is worth saying plainly what this is not. You are not making paintings. You are not producing anything anyone will see. The pages will contain muddy colors, buckled paper, and shapes that were meant to be trees. That is the ordinary condition of the practice, not a phase you eventually leave.
Why Paint at All
There are a few reasons paint earns its place in a notebook that words already fill.
Color records something words are slow at. A day has a temperature and a brightness, and a band of ochre or a wash of cold blue often catches it faster than a paragraph does. Months later, flipping back, the color reaches you before the writing does.
Painting also slows a journaling session down. Watercolor requires waiting — for a wash to dry, for a layer to settle — and that waiting turns a five-minute entry into twenty quiet minutes. Many people find the pause more valuable than the picture.
And it gives you somewhere to go when the writing stalls. On evenings when nothing wants to be said, mixing a color and putting it on the page is still an entry. You have shown up, made a mark, and dated it. That counts more than it sounds like it should.
The Paper Problem
This is the one thing worth understanding before you buy anything, because it is where most beginners give up.
Watercolor is water. Ordinary journal paper, at 80 to 100 gsm, absorbs it, swells, and buckles into permanent ripples. Heavier applications will bleed through to the reverse and often to the page behind that. Your notebook will not be ruined, exactly, but it will cockle badly enough that many people conclude they are doing something wrong.
They are not. The paper is simply too thin. Watercolor paper is typically 200 gsm or more, and true watercolor paper is 300 gsm, which is closer to thin card than to notebook paper.
You have three reasonable options.
Use a mixed media notebook. Paper around 200 gsm handles light washes with only mild buckling and rarely bleeds through. This is the best compromise if you want one book for both writing and paint, and it is where most people should start.
Use a dedicated watercolor sketchbook alongside your written journal. Two books, each doing what it is good at. The disadvantage is that the practices drift apart and the painting one tends to go unused.
Paint on separate paper and paste it in. Cut watercolor paper to size, paint on it, let it dry flat, and glue it into your existing notebook. This keeps your regular journal intact and gives the paint proper paper. It also produces a pleasing physical layer on the page.
If you already keep a journal you love on thin paper, take the third route rather than replacing the book. Adapting the practice to your notebook is easier than adapting to a notebook you did not choose.
A Small Kit That Works
The kit for this is genuinely short, and buying more than this at the start is the most reliable way to spend money on something you will not use.
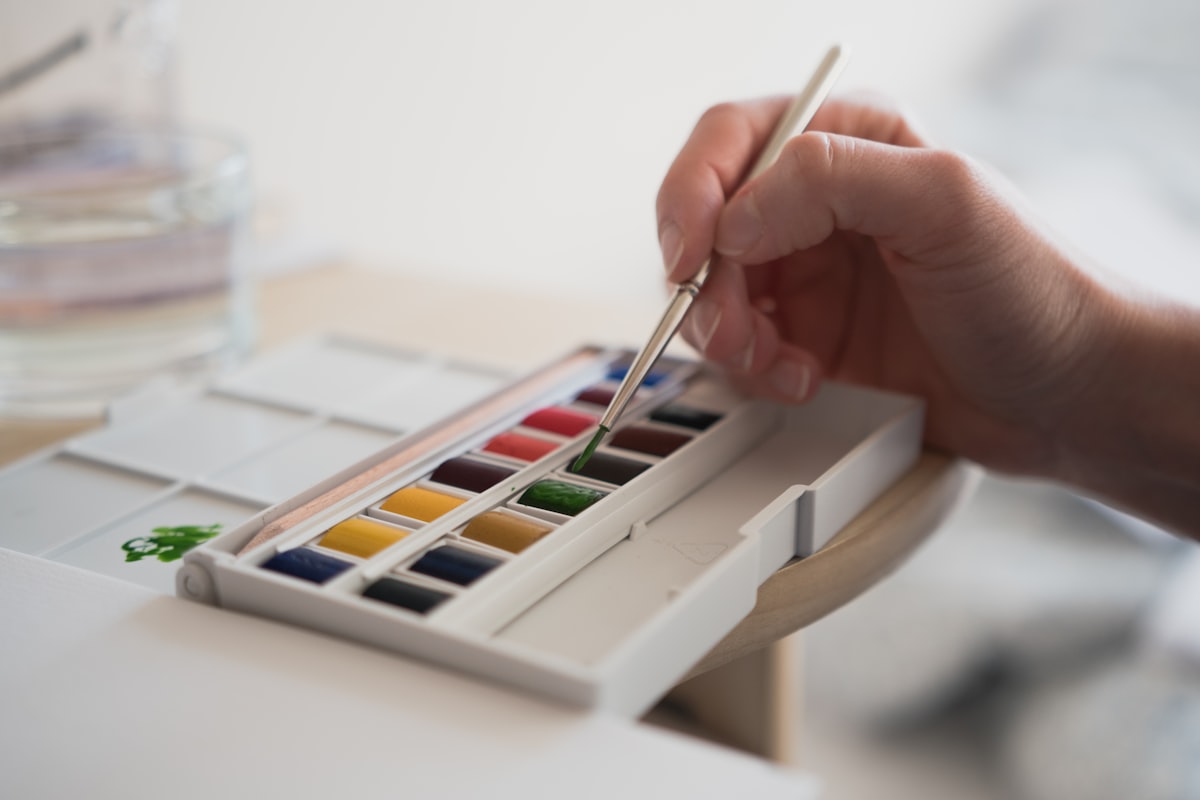
A pan set with a few colors. A small tin of dry pans is more practical for journaling than tubes, because it opens, works, and closes without setup. Twelve colors is plenty. Six is enough. Student-grade paint from a reputable brand is entirely adequate for a notebook and costs a fraction of professional pigment.
One round brush. A size 6 or 8 round with a decent point does almost everything a journal page needs — broad washes when you press, fine lines when you use the tip. A water brush, which holds water in the handle, is worth considering if you want to paint away from a tap.
A water container and a cloth. Any small jar. Any rag or piece of kitchen paper. The cloth is not optional; controlling how much water is in the brush is most of the skill, and you control it by touching the brush to the cloth.
A waterproof pen. This matters more than it sounds. If you write with a fountain pen or a standard rollerball and then paint over it, the ink will lift and smear into the paint. A pigment fineliner marked waterproof or archival stays put once dry, and lets you write first and paint over.
That is the whole kit. Paint, brush, water, cloth, pen. Everything else — masking fluid, salt, additional brushes, expensive pigments — is an addition you make later, if a specific page asks for it.
Four Techniques That Cover Most Pages
You do not need to learn watercolor properly to use it in a journal. Four behaviors cover nearly everything.
The flat wash. Load the brush with watery paint and pull it across the page in overlapping horizontal strokes, working quickly enough that each stroke meets the wet edge of the last. This gives you a field of even color — a background for writing, a sky, a block of mood at the top of a page. Tilting the notebook slightly helps the paint flow downward and settle evenly.
Wet on wet. Brush clean water onto an area first, then touch color into the damp surface. The paint blooms and spreads on its own, producing soft edges you could not draw deliberately. This is the technique that looks most like watercolor, and it is almost entirely out of your hands, which is the pleasure of it.
Wet on dry. Paint onto dry paper for crisp, controlled edges. Use this for shapes that need to hold — a leaf, a building, a band of color with a definite boundary.
Layering. Watercolor is transparent, so a second layer over a dry first one deepens the color and creates a new shade where they overlap. The rule is to let each layer dry completely before adding the next. Painting into a half-dry layer lifts the color underneath and turns it to mud, which is the single most common way a hopeful page goes wrong.
Two habits sit underneath all four. Work light to dark, because you cannot lighten watercolor once it is down. And use less water than you think for color, more water than you think for washes.
Combining Paint and Writing
A watercolor journal is still a journal, and the writing is what keeps the pages legible to you later.
The order matters. There are two workable approaches, and mixing them badly is what produces smeared pages.
Write first, paint over. Use a waterproof pen, let it dry fully, then wash pale color across and around the words. The text shows through the transparent paint and the page becomes a single layer. This is the easier route.
Paint first, write after. Let the paint dry completely — genuinely dry, not nearly dry — then write on top of it or in the white space around it. Ink sits down cleanly on dry watercolor. On damp paper it feathers and the nib drags.
A few page formats are worth knowing when you are unsure how the two should share the space.
Color band and text below. A wash across the top third, writing underneath on clean paper. Simple, reliable, and quick.
Small study in the margin. The entry written normally, with one small painted object beside it — the mug, the plant, the view from the seat you were in.
Text written across a pale wash. A very dilute background over the whole page, dried, then the entry written straight across it. The color sets the tone without competing with the words.
The paint does not need to illustrate the writing. A page is more interesting when the two comment on each other rather than describe each other — a warm yellow wash beside an entry about a difficult afternoon says something neither element manages alone.
Starting Without a Subject
The most common obstacle is not technique. It is not knowing what to paint.
Paint one color that matches the day. No subject at all. Mix something that feels like today and put a band of it on the page beside the date. Kept up for a month, this becomes a surprisingly readable record.
Paint the object nearest to you. Whatever is on the table. Accuracy is irrelevant; you are recording that this object was in front of you on this evening.
Paint the weather. The sky at some point in the day, reduced to two or three colors and no detail at all.
Paint the shape of a feeling. Not a symbol of it — a shape and a color. This sounds vague and works better than it reads.
Fill the page with a wash and write on it tomorrow. Preparing a background is a complete session on its own, and it removes the blank-page problem from the following evening.
Keeping It Sustainable
Painting asks more of a page than plain writing, so daily painted entries tend to exhaust the practice within a few weeks.
A more durable rhythm is one painted entry a week, with your ordinary written entries continuing as usual in between. The paint becomes a slower companion to the writing rather than a second obligation competing with it.
Keep the kit out and open where you journal. A tin that has to be fetched from a drawer gets used considerably less than one already sitting beside the notebook. This is a small thing and it is most of the difference between a practice that continues and one that does not.
And as with any journal, do not try to catch up after a gap. Open the book to the next blank page and start there. A stretch of unpainted pages is honest, and it is part of the record too.
Common Pitfalls
A handful of mistakes recur, and knowing them in advance shortens the learning curve considerably.
Too much water on thin paper. The main cause of buckling and bleed-through. Use a drier brush on lighter paper, or move to heavier stock.
Painting into a wet layer. Adding color before the previous layer has dried lifts what is underneath and muddies both. Wait longer than feels necessary.
Overworking. Watercolor is at its best in few strokes. Continuing to adjust a passage dulls the color and abrades the paper surface. Stopping too early is nearly always better than stopping too late.
Non-waterproof ink. Writing with a fountain pen and then painting across it produces a smear that cannot be recovered. Test your pen on a corner before trusting it.
Closing the book too soon. Damp pages stick together and lift paint from the facing page. Leave the notebook open until you are certain it is dry.
Comparing your pages to the ones online. The watercolor journals that circulate on social media are curated, photographed in good light, and frequently posted only because they were the best of a much larger and messier pile. Real books are full of pages nobody would share.
What This Practice Becomes
A watercolor journal kept for a year is a different object from a written one. Flipping through it, you feel the year before you read any of it — the colors shifting with the seasons, the dense painted weeks and the plain written ones, the pages where the paint went wrong and you kept writing anyway.
The paint is not there to make the journal beautiful. It is there because color holds something that sentences reach for more slowly, and because mixing a wash on a tired evening is a way of showing up to the page when words are not available.
Watercolor journaling is not art, and it is not therapy. It is a way of paying attention to your days and keeping a record with more than one kind of mark in it.
Start with a cheap pan set, one brush, and a page you do not care about. Put down a band of color and write the date beside it. Whatever it becomes is enough.
Was this article helpful?
Thanks for your feedback!


